I've gotten a lot of questions about how to care for air plants, so I decided to share some of the tips I've gotten from air plant enthusiasts over the past couple of years.
**full disclosure** Plants are my hobby--I do not have any academic/formal training in plant care or horticulture but I have worked at plant boutiques that specialized in air plants, succulents, and terrariums. I've learned how to take care of my plants through trial and error, and talking with experts/fellow plant enthusiasts, like my good friend Mike.
To start off, air plants (tillandsias) are epiphytes, meaning they do not require soil in order to grow. They collect moisture and nutrients from the air through structures on their leaves (trichomes). They use their roots to anchor onto trees in their natural habitats. This is why I love air plants so much--I can set them just about anywhere and not have to worry about getting dirt all over my house (although it kind of happens regardless). Based on my own experience and talking with other epiphyte/plant enthusiasts, here's what keeps air plants happy:
- Light
Air plants fare well in bright, indirect light. They do not do well under artificial light--after a week or two they will start fading to a dull green and their leaves will curl or shrivel up.
You can place in an area with direct sunlight (if they are outdoors), but be warned--if the plants are wet they may burn or dry up (the dew drops act like mini magnifying glasses)
- Water
Watering air plants can be tricky. What I generally do is submerge all of my plants in a 1-2 gallon bucket and soak them for 10 minutes.
Nancy, one of the owners at Shelldance Nursery recommends submerging air plants once a week for no more than 10 minutes. Keeping the plants submerged for too long will only cause cell damage. Air plants don't stop absorbing water, and what winds up happening is your plant will start to feel soggy, and eventually fall apart. It's tragic. Try to avoid this and set a timer! Ever since I decreased watering time, I haven't had a single tillandsia swell up and fall apart on me.
- Air
Air plants thrive in areas with a fresh flow of air, so sealed containers are not ideal spots for air plants. Make sure to place them in a space with fresh circulating air. If you do keep your air plant in a sealed container, you should leave it out one day a week for circulation and air flow.
Air after watering:I gently shake off any excess water, and set them in a basket or colander upside down or sideways so all of the water drains out. Once they are dry, I place them back in their respective "homes". - Plant Food (Optional, although highly recommended) Orchid food is a good way to promote healthy growth. I use Shelldance Nursery's Professional Orchid Food and sometimes use Epiphyte's Delight

Keep in mind, your care routine might differ depending on how you house your air plants.
- OUTSIDE
Some tillandsias actually fare better outdoors, and in my case, most of my plants do because I don't have good lighting indoors. I place mine in an area where they get early morning sunlight and partial shade during the hottest times of the day (although it's not too much of a problem since San Francisco is almost never sunny). If your area doesn't experience any extremely dry or wet weather, let nature take its course. You should still water once a week if it doesn't rain very often, I use water mixed with orchid food (pinch of orchid food per gallon of water) and pour right over my outdoor plants. - INDOORS
Air plants thrive in areas with a fresh flow of air, so if possible, keep them in a room with lots of natural, filtered light and fresh air. - BATHROOMS
I find that bathrooms with a lot of natural light and constant flow of air are ideal places for air plants. Depending on how humid your bathroom gets, you may not even have to water them at all. If you don't take hot, misty showers, I recommend a weekly watering with orchid food. - INSIDE A VESSEL, TERRARIUM, OR BOTTLE
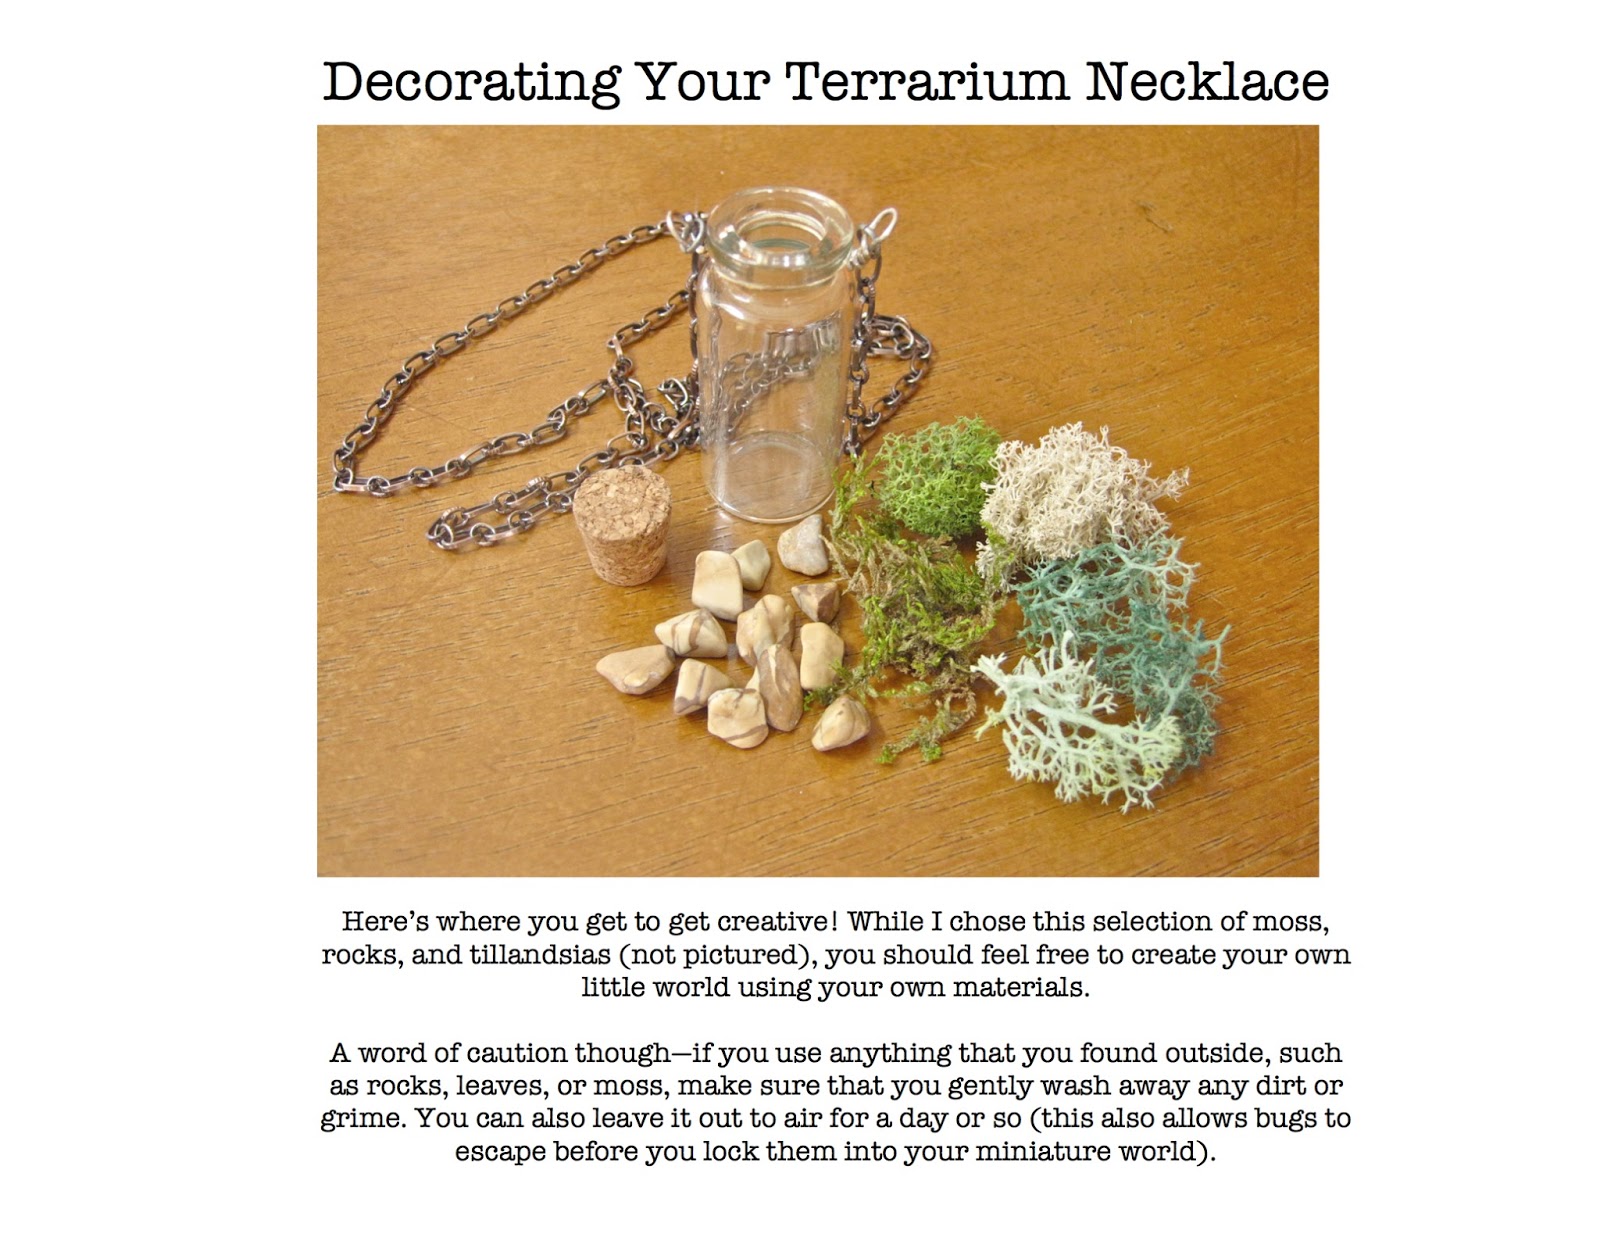
 |
| This care sheet was borrowed from my Terrarium Necklace Tutorial |
Troubleshooting
- If the tips are turning brown/drying, or shriveling:You might need to water more frequently, like once every 5 days.
- If your plant looks limp, droopy, or a sickly green color:
The plant most likely needs more natural/filtered light - If your plant feels soggy, its outer leaves are falling off to the touch and/or browning from the bottom: HALT. You might be giving your plant too much water! You can sometimes save your plant by placing it in an empty shallow dish and let dry for a few days. It may or may not survive--mine never did at this point unfortunately. But it's alright-- if at first you don't succeed, try, try again!
- If little plants are sprouting up near the roots and in between leaves:IT'S PRODUCING BABIES! I generally leave these "pups" alone until they're about 1/4 or 1/3 the size of the original plant and by that time they can be plucked off.
 |
| This is one of my first air plants. You can tell I wasn't taking good care of it because the tips are brown and dry...but LOOK! My plant has gone through some rough times, but it still produced pups! |
I hope this helps, please keep in mind that this is my watering routine, and there are other ways of watering your air plants. I've spoken with different experts and received different care tips, and so far this regimen has been successful, almost all of my air plants look plump and healthy. If you have specific questions, you can always contact your local ephiphyte/orchid expert or browse gardening forums.
Good luck and if you have any other successful air plant care tips, please share them below!